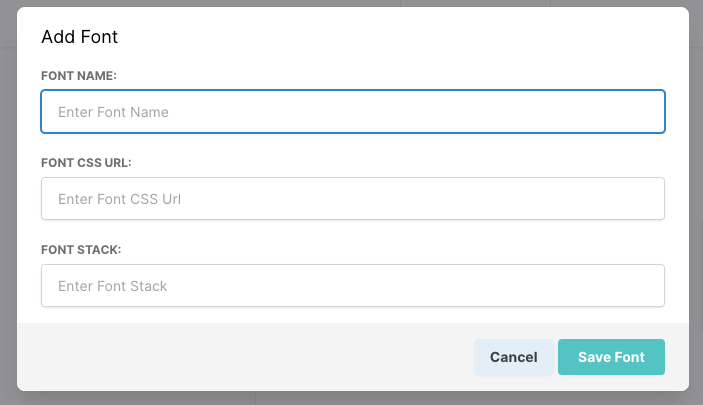
Adding custom web fonts to the editor is done through the Editor Settings section of the Application Settings page.

Here you can see what fonts have been added already (in addition to the system fonts available in the editor). And you can add custom fonts using the Add Custom Font button.

Here you will provide:
Font Name: The name of of the font shown in the editor's font menu drop down.
Font CSS URL: An HTTPS url to the hosted css file containing the @font-face properties defining the hosted web fonts.
Font Stack: The font family definition with fallback fonts defined e.g. Lato, Times, Arial.
If you wanted to add the Google font Lobster (https://fonts.google.com/specimen/Lobster?query=Lobster).
- Add the name in the Font Name field.
- Copy the url provided by Google, https://fonts.googleapis.com/css2?family=Lobster&display=swap and paste that into the Font CSS URL field.
- And then copy the font-family definition provided by Google: 'Lobster', cursive;
If you want to use your own custom web fonts, you'll need to host both the font files and the CSS file using SSL (https). The CSS file hosted at the defined URL should contain only the @font-face definition and not arbitrary css values. Here is an example of a google font:
@font-face {
  font-family: 'Lobster';
  font-style: normal;
  font-weight: 400;
  src: url(https://fonts.gstatic.com/s/lobster/v27/neILzCirqoswsqX9zo-mM4MwWJXNqA.woff2) format('woff2');
  unicode-range: U+0460-052F, U+1C80-1C88, U+20B4, U+2DE0-2DFF, U+A640-A69F, U+FE2E-FE2F;
}
Comments
0 comments
Article is closed for comments.